26/10/2014

The Pilbra Cab

Noels West Coast Mining Locos

     I thought that I would add a few images of the Pilbra Cabbed locos showing the brass etching done by Vic and added to the locos by Noel for his West Coast Mining RR. after showing some of the completed units during the operating on the SFRSD on Saturday night in my post yesterday.


     Noel and Vic have done a fantastic job with these unique looking locomotives that now look the part hauling iron ore from the mine to his rotary ( yep I said rotary ) dumper on his WCM RR.
     If ok by Noel I'll ask him if I can post some shots of the completed locomotives to show just how nice they look but first I need to take the shots.

Thanks for stopping by.
Rod.

25/10/2014

20 years and going strong

Who would have thought
    
     It's hard to realize that this layout the SFRSD my 7th since 1969 is 20 years old this month. To help celebrate the occasion I invited many of my friends over for a timetable run in the afternoon followed by Pizza and a casual run in the evening. However as they say the best laid plans of mice and men can go astray as a few of the guys had family commitments and could not make it.     
     So I decided to change the day by starting latter have pizza for dinner then a run on the railroad.
     As I have done in the past two years I asked the guys to bring over some of their trains to run on the RR and a few did just that.
    Dennis brought along two of his Conrail locos and a string of TOFC's and a freight train to run.
    Noel came along with his Iron ore train and cool looking locos that you will see below and John brought along a train as well.
    I apologize for the quality of the images, they are stills from my video camera.


Two Conrail locos brought along by Dennis running through Hackney.
  
A meet at the exit from Augusta


     Noel brought along three of his unique Pilbra cabbed locos. There are 15 in total with each group of 5 painted in a slight variation to represent a different batch ordered by the iron ore company, West Coast Mining. The cabs are all etched brass created by our good friend Vic including the dynamic brake blister, the radiator and the fuel tanks all made from etched brass all fitted to Kato U33C units.
    Noel and I did the painting of all 15 during the course of one day. Using Badger Model flex paint sure helped as we were able to see each coat dry giving us plenty of time to mask, paint and repeat all day. The decals are custom made to Noels design.

The white panel over the cab is to keep the engineers cool. It acts like a tent fly by having an air gap between it and the cab roof.
If you look closely you will see the variations in each loco as each one of these represents a batch of 5.
    

     John got nostalgic and brought along his very first N Scale loco and train. A pair of Kato GP30 locos and a string of Roundhouse Santa Fe Box cars. Way to go John.

Don't they make a nice couple.
     The night would usually see some additional trains like L&N, UP, D&H, Mexican, some Victorian locomotives and additional ATSF locomotives and rolling stock on the RR brought along by the guys who could not attend.
     It was a good night so thanks for coming along guys.
     After all of the years that have passed there are still several buildings to be started and placed on the RR. Ponca City is short about 4 and there is still one to add to the town of Winfield. Now that spring is here and with summer fast approaching it might just be what I need to get these started.
Thanks for stopping by.
Rod.

05/10/2014

Construction Company done

That should be it.

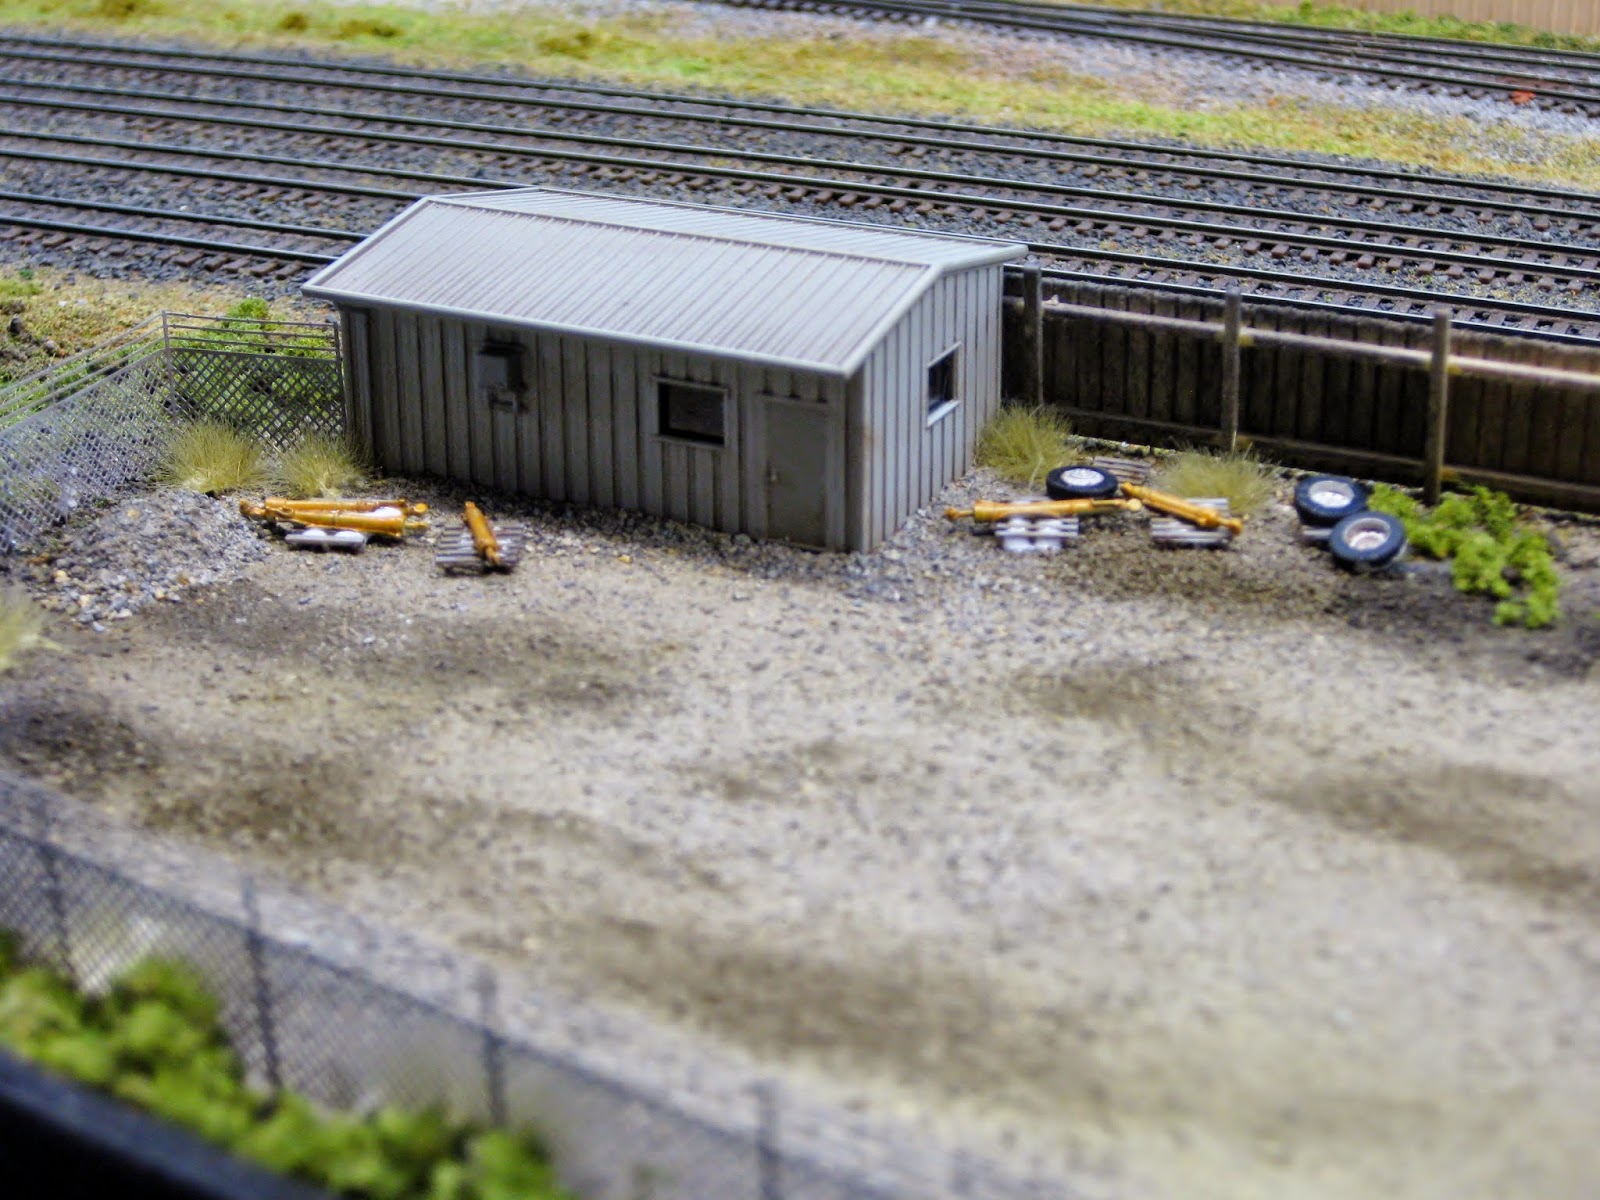
     Yesterday and part of today I set about to complete my construction company site. Yesterday was spent making a paling fence to sit on the rear boundary track-side and then installing all of the fences and office building. The chain fence is from Gold medal Products that I sprayed flat primer grey dusted with a bit of rust then another light spray with the grey again. The paling fence was made using small pieces of Northeastern scribed siding and 4 inch HO gauge posts. They look a tad too big but I think they pass the 3 foot rule. I then gave it a wash using the brown and black Panel line paints and set it aside to dry under a weight to stop it from warping.
    I added the small details and grass tufts after first dusting on some weathering powders to make the ground look like it had had oil spills.


     And with a few added tufts and a couple of pallets with left over pieces from the GHQ kits

The shinny stuff is tacky glue. I took the shot before it had dried
 Then I set about adding all the completed kits except they all do not fit. So some just have to sit outside the fence.


     So that is another project that has been in the melting pot for a while completed.
So until next time, thanks for coming by.
Rod.

29/09/2014

Starting on the construction company site

Started ground work
     The weather was kinder on Sunday afternoon and yesterday was one out of the box so out to the SFRSD RR to get some work done.
     On Sunday I scraped back some of the old Woodland scenic ground cover and applied a coating of "large cracks poly filler" to the area where the company is to be sited. That dried overnight quite nicely so a quick scrape to remove a few small lumps and a fresh coat was applied yesterday before lunch.
    While that was drying I decided that I needed to weather a few more cars on the roster. So I picked up two of my old Bachmann hoppers, a new BLMA hopper and a two bay Burlington Northern hopper that I purchased at a friends sale. I purchased this knowing it was going to receive some sort of treatment.
     This is how the two bay looked before being attacked.

My apologies for it being slightly out of focus
     I decided that the Burlington logo was to receive a spray of flat white whilst at the same time protecting the reporting number (until I come up with another idea). Once that was completed I then sprayed the whole car with a mixture of flat white, a very small amount of brown and a lot of thinners.
    Once all this was dry the whole car was given a light wash of Van Dyke Brown oil paint. I have not dull coated the car yet so it might look a bit shinny.
    And the result.

     As you can see I need to give the underside some weathering, paint the trucks, wheels and couplers but it's getting there.
     I did these as well.

Some masking before spraying to give the effect of a body repair.

And Ditto.
     And to top off the day I applied the first layer of powdered stone dust to the construction company site.

A mix of powdered stone dust and what we call Lilydale toppings was sieved on using an old brass tea strainer.
     The mix dried nice and light overnight so in the days ahead I should be able to make some more progress with the surrounding ground cover.

Thanks again for dropping by.
Rod.


27/09/2014

Not much happening Part 3


All construction vehicles are now built.
     Well last week I finally got to complete all bar one of my construction vehicles that I intend to put into a construction company yard at the East end of Augusta.
     This has been a drawn out process due to having a cold for almost 4 months and building a new extension to our Budgerigar aviary during our winter season here in Melbourne.
     Spring is now well underway and so as the temperature begins to rise I feel more inclined to venture out into the SFRSD room and get some additional scenery completed.
     The first task will be to construct the company construction site by clearing away the old ground cover that was laid down many years ago. Then prepare the site to add all the bits to hopefully have it look presentable.
     So I hope to take some in progress shots over the coming weeks as I would like to have this completed before the 25th of October which will be the SFRSD 20th birthday.
     The past two years I have held a day ops session stopping for pizza for dinner then allowing the guys to put one of their favorite trains on the RR for a run and some photo run buys.
     Anyway before all this gets underway here are a couple of quick snaps of the gear that is going to be installed. There is some equipment already sitting in the RR room that I have shown on previous posts. the Low Loader, side lifting crane and the crawler bucket crane.


     They don't look that good in the plastic containers so I hope they look better by the time they are on the RR.
     Before I log out today I did add some new rolling stock to the SFRSD last Friday before my monthly ops session. I had in my draw a Pacific Western CN hopper that was from their Mystery car range I bid on and won at an N Scale Collectors auction many years ago. As I paid way too much for the car and (thank you Intermountain for re-releasing and dropping its value) I decided it should be on the RR. I also picked up 3 BLMA ATSF hoppers at a good price from M.B.Klein. Picks next time.

That's it for today. Thanks for stopping by.
Rod. 

18/09/2014

Not much happening part 2


More construction equipment
     It hasn't been that good weather wise over the past month so I have taken advantage of sitting at our kitchen table assembling more equipment to add to my future construction site on the SFRSD.
     The latest piece is a vehicle that Vic gave me quite a while back. It is one with his etched brass cab, brass chassis along with many added details, like etched grill and bumper, rear mud flaps, tube exhaust pipe and mufflers and safety board behind the cab. It is also fitted with wheels of time wheels and Vics etched side mirrors and sun visor.
     To start painting it I had to strip it completely and once that was done I gave all of the brass bits except the cab a spray of Tamiya Primer Grey followed by Tamiya Bright Orange the same as all the other construction pieces. So paint on the wheels, turntable and back board with Italeri Metal. Flat Steel paint and a wash of panel line paint and that was finished. Oh I forgot the Pan Pastels grey on the tyres.
     At the same time I completed a GHQ grader and still working on a GHQ drag crawler crane.
     An old Atlas LN9000 has also had some treatment to add to the collection. A bit more work needs to be done on the crane and then I will be ready to prepare the area on the RR to accept all of this stuff.
     Here are a few pics of the progress thus far.


     Well that's about it for this post so thanks again for stopping by.
Rod.


30/08/2014

Not much happening

New Construction vehicle

    As mentioned in one of my last posts (too long ago) I am intending to have a small construction company positioned at the East end of Augusta.
    The latest addition is a GHQ scraper. This kit can be a bit tricky as there are a few parts that need to be fitted all at the same time to ensure it fits and look correct.
     Anyway I finally got it completed after several weeks of not doing anything.
     The usual spray of grey surface primer followed by a spray of Tamiya Brilliant Orange followed by a wash of Tamiya panel line paint and its done. I did use some Pan Pastels grey on the flat black painted tyres after firstly giving them a coat of Polyscale MUD to make them look like they had done some work.


    This unit should fill a nice spot in the construction company's yard once the other equipment is completed.

That's all for today.
Thanks
Rod.