Been a while since my last entry.
I thought it was about time to get back and add another post since its been quiet a while since my last post.
Winter has set in here in Melbourne gusts of wind yesterday up to 125 kilometers an hour 10 degrees C with a wind chill down to 4 degrees so apart from driving up to Brisbane and back four weeks ago not that much has been happening as we have been staying in doors.
I am however working on some recently purchased GHQ kits. A shovel, Low loader, a D8Cat bulldozer, a Cab over Freightliner and another Grain Trailer. (Well you cannot have enough grain trailers in Kansas). The shovel is complete including painting, the low loader is well under way as too the bulldozer.
 |
| I have sprayed this with Tamiya Brilliant Orange, Dullcoated then a wash of VanDyke Brown. |
 |
| More bits to add to this |
Apart from these I have been weathering some more locomotives. John a good friend and I attended the Plastic Modellers Exhibition held over the long weekend in June. It is always worth a visit to see how folk model plastic planes, ships, trucks and cars along with the military modellers who always impress. Some of the models on display were outstanding with just so much detail. I have always enjoyed looking at the military models. The way they can make these models look just so realistic is amazing. So I have often wondered why the military modelers and model railroad modelers haven't got together to share ideas I think we could learn a lot more about how to weather our locomotives and rolling stock. Then there is the vast range of paints and powders that are available that the military modelers have available to help create such masterpieces.
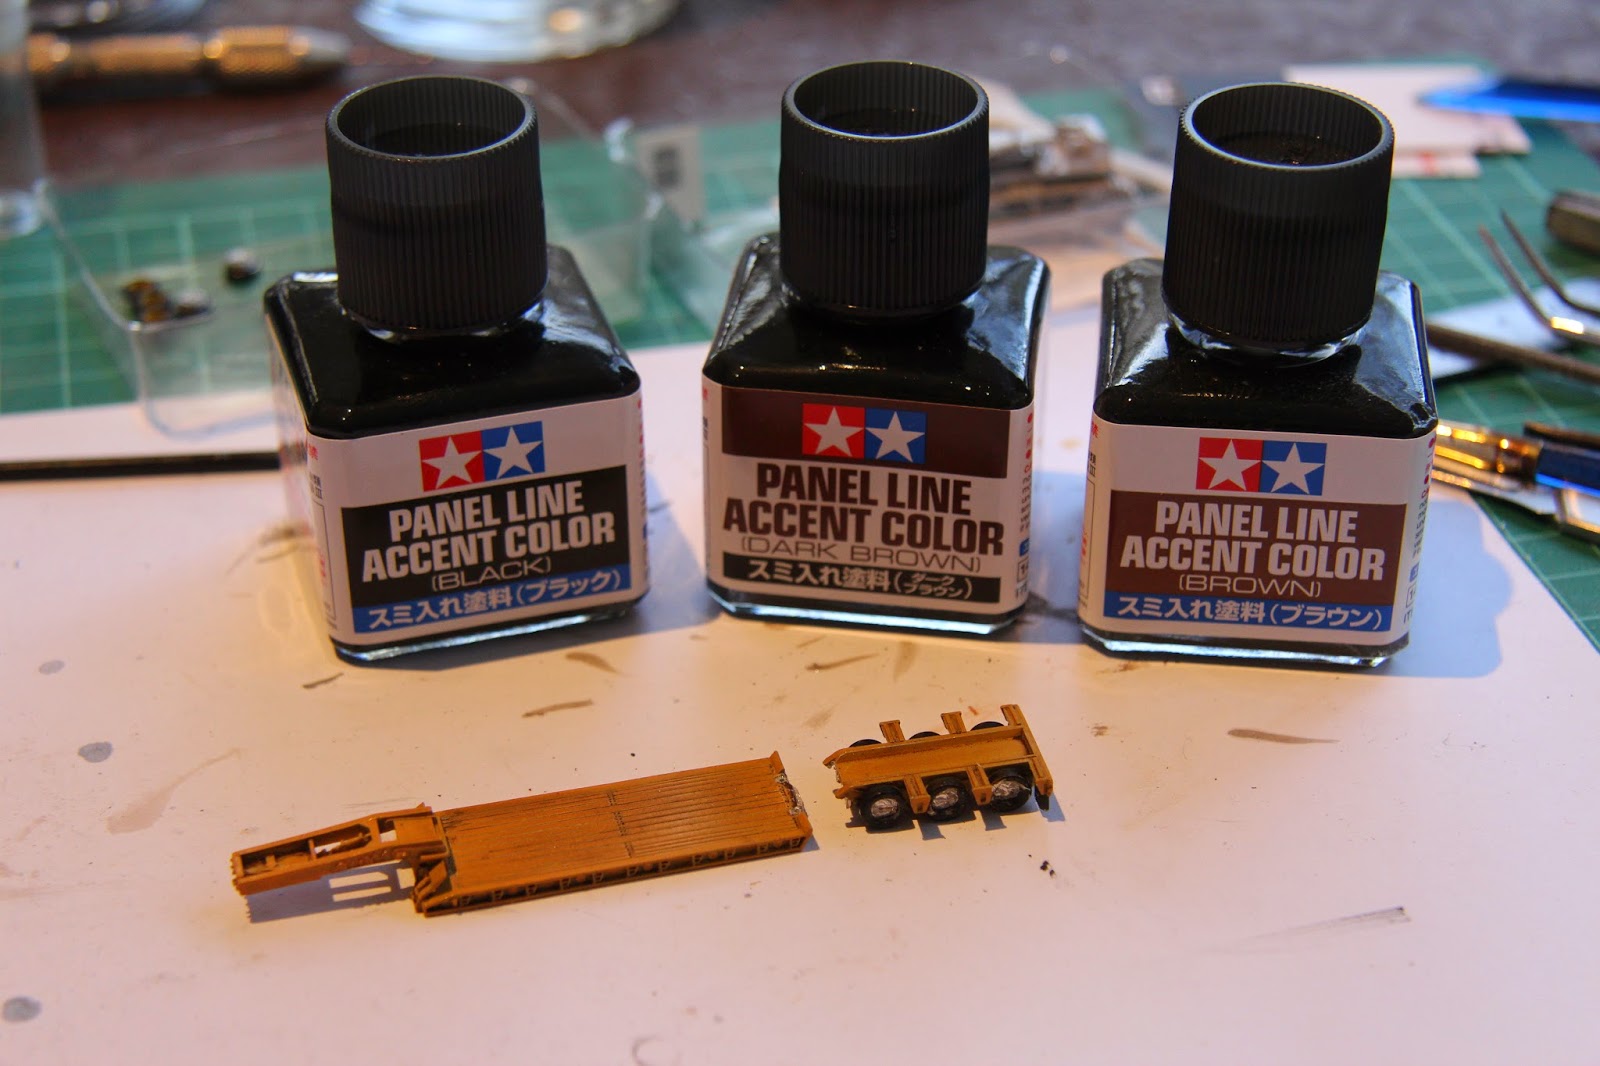
A weathering clinic was about to start so John and I grabbed a front row seat and watched as this young fellow rusted up the back of a pre-painted tank using Tamiya panel line paint and weathering powders. The grills on this tank just popped. Granted it is a larger scale than I am accustomed to but I thought that some of these techniques could be applied to my locos.
The panel paint comes in three colours, Black, Dark Brown and Brown so I purchased one bottle of each.
So far I have used mostly the Black and Dark Brown in the grills and fans on about 6 locomotives. This makes the job of blackening the grills so fast it is done in minutes. You might recall in my last post that it took me about one hour to mask up one Alco Locomotive to spray the grills on a locomotive I was spraying for a friend. Well that job is history I will be using this technique from now on.
Here is a shot of a highly weathered SD 45 that I had previously painted and decaled for the failed merger between the Santa Fe and Southern Pacific RR's. I had previously dulled down the body of the loco with a light spray of flat white and thought this would be a good candidate for a test run.
 |
| I used the Tamiya Panel Paint on the grills, fans, truck side frames and around the roof and the roof mounted air conditioner. | | |
|
I applied the panel paint very carefully in small amounts around the doors and door latches, around the turbo shroud and around the battery box doors. It is hard to see the difference in my rather poor images however on the RR it looks fantastic, I am very pleased.
I also added some Pan Pastel rust powder along the roof and on some of the fans and grills. A small dab of rust under the battery box and she was ready to put back into service, shabby but now she really looks like she has well and truly earned here keep on the SFRSD.
Well that's it for another post so thanks for stopping by.
Rod.


.jpg)
.jpg)
.jpg)
.jpg)