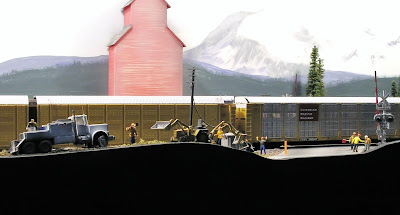
Once we decided to build the TRC we wanted to push the envelope to show N Scale to its best especially since it was to primarily be an exhibition layout.
The track plan was worked out over the kitchen table so we could have some industries at which to switch (to show the public how operations work) along with those fantastic snow / rock slides along the canyon which are a feature of the area.
We also decided that the RR would use Digitrax DCC, use Micro Trains code 55 track along with some hand made turnouts and an important feature in our minds was to incorporate a signalling system. We wanted the layout (track) to be much higher off the ground (56 inches ) so you looked into the trains and a deep fascia to help frame the scene and allow room to hold our Digtrax Up5's and turnout control panels. It also provided room under the track to hold all of our trains, signalling system and the Digitrax command station and power packs.
Vic is a master at producing custom made, brass etched signals as seen on my RR.
The track plan is simple. Single track with a passing siding on both sides (to allow bi-directional running) with a couple of industry tracks and a house track on the front module. We added four storage tracks behind the front backdrop to allow us to make up trains which also allowed us to change the trains more often to keep the public interested.
The number of modules was also important so we could fit them into our existing vehicles. I chose to build the rear half of the layout so that comprised the two corners and the three four foot modules. Vic had a ute so he took to build the front sections which comprised two six foot straight modules and the two larger corners. In fact all of the layout was built in my workshop given that I had all the machinery necessary to build what was needed. The layout is 16ft long and 8 ft wide so plenty big enough. The front modules are 18 inches deep with the rear only 12 inches.
We purchased several sheets of 7ply and had it ripped to 3 inch wide strips with which to make all of the frames. We wanted to use this as we thought it would be more stable than plain pine.
It took quite a few months to get to the stage you saw on the first post but there was still a long way to go.
The signalling system was one of the biggest hurdles. We had seen a system when in San Diego at an N Scale convention and the following NMRA train show called Signalling Solutions. This system was quite new however it looked like it might just do the trick for the TRC. Vic and John made contact with the owner, sent him our track plan and following many emails later agreement was made as to what was needed to run the layout as prototypical as we could. Noel, one of our longstanding friends having an excellent knowledge of wiring and an N Scale modeler to boot was gently persuaded to do the wiring of the signalling system. I'm not sure Noel nor any of us realized just how difficult this was going to be. So after many wiring diagrams later, (some 3 feet long) we were able to get the wiring in, mount the main boards and all of the signal drivers. Then lots of tweeking to get it to work.
 |
| Little John did all of this wiring |
 |
| This was a Walthers station Kit that I altered slightly to make it look a bit more Canadian |
 | |
| Taken as we were checking to see how we could fit them into the new trailer that Vic purchased to carry the whole layout. |
 |
| It fits! Just no legs and lights. |
 |
| Just one of Vic's superb Signal gantry's |
The first time we were able to use the lights was at the 2006 AMRA Model Railway Exhibition at Box Hill. We were also able to use our black drapes so the layout looked quite good once the layout was set up, drapes on and the lights all plugged in.
 |
| I took this shot before the crowd arrived for the second day of the AMRA exhibition in 2006 and we were very proud to receive our first.award. |
 |
| A ten loco lash-up created by Brendan one lunch break |
There are a few You Tube videos of the TRC taken by others so if you want to see some action head over there.
The TRC was a very enjoyable layout to share with a good many mates.
Thanks for stopping by.
Rod.


No comments:
Post a Comment