18/12/2020

Modified Scenery

 It needed changing.

    After working on lots of other stuff my eyes kept calling me back to some of the scenery I had done in the earlier stages of this build. Too many trees and the ground cover did not look as good as I would have liked, so without a second thought all of the pine trees that had been planted were pulled out ready for faze two.

    I wanted add much more dept to the grasses and planned to spread out the pine trees as I had seen in many inspirational images from the Colorado area. This plan also called for more space so I can install some Scenic Express trees with some autumn (fall) colours and add more undergrowth as well.

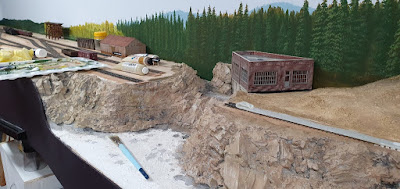
   I did not take any shots once the trees were removed however as a reminder here is what the area looked like before there was any grass or trees.


   And here it the area is as it looks as of today. Lots more static grass using three shades and various lengths in an attempt to get some more depth to the look of the grass. The pine trees were then replanted in a better (well to me) position and spread out more than before. I then set about colouring the water courses for the creeks.


     There is lots more to do along this area however this is where I stopped until the mood takes me back.

Thanks for dropping by.

Rod.


06/12/2020

So long ago

 It's been a while since my last post.

     I've been pretty busy on the Monarch Branch over the past several months during lock-down however I have been delinquent in adding anything to my blog since October.

     One of the industries I want to model in the town of Cedar Creek is a tie treatment plant. That's been more difficult than I thought as there does not seem to be a lot of info available of plants that existed in the early 40's or earlier.  I did finally find some images and a story that has assisted me to start moving forward.

     One point I read about was the small Davenport Gas Mechanical style loco that was used to push then remove the ties from the pressure treatment vessel. An aha moment, so that started the juices flowing and after several unsuccessful attempts to find a suitable loco a good friend said "I think I have just what you are looking for". I have a Roco HOn30 in bright dark blue with a yellow stripe and its yours.

    A few days later and it was in my hands ready for the work to start.


     Once the body was off I set to removing cast on details that I did not think suited my area. Items such as cast on headlight and reversing light, strange looking items on the rear of the body as well as removing the exhaust a roof vent.

    Stripping the paint took at least a week, however I was pleased to see it all off so I could start to add some details. I fashioned front and rear lights from styrene and made a new air cleaner, exhaust and muffler for the bonnet. Additional window frames were added along with window shades.


Here she sits with all the add-ons and primed ready for paint.


     Painting was next, I chose to paint this the same colour as I used on my ON30 Bachmann Gas Mechanical several years back. However I wanted to start with flat black in the corners and grill areas so as to help highlight these areas.

    I love weathering and rust, so this was going to cop it.

Done.

     Once the first colour was dry it received a light filter wash of blue oil paint and allowed to dry for several days. Rust was then applied generally over the whole unit and especially on the muffler using rust coloured oil paints.


    The next thing to do was add an N Scale coupler to the front. This meant some cutting and filing to get the M/T Body mount short shank coupler to fit. Once this was in place some styrene made to look like timber was added along with some NBW's to finish off the front. (Thanks to GM for this suggestion).

   Painted the chassis, springs etc, sat the body back on and she was all done.

All done and it runs.

    Thanks for stopping by.

Rod.


16/10/2020

A video I forgot to add to my Blog

Construction of my Lost Creek RR in ON30

     I built this layout several years ago in another shed that I had previously used as a wood shop. It is also the area that we built the Thompson River Canyon Layout N Scale layout in. I had a lot of fun during the construction faze and the super detailing of the gas Mechanical Locos.

    I did not take any video of the layout however there were many images taken. So the video is a gathering of many of these to show the progress of my Lost Creek RR.


   This layout gave me so much pleasure I am sure it is helping with the construction of my Monarch Branch.

Rod.

04/08/2020

Building the D&RGW Monarch Branch in HOn3 Pt 2

    This time I selected the correct format for the production.

Part two now on YouTube and here.


Thank you for taking another look.
Rod.

03/08/2020

Building the D&RGW Monarch Branch Part 1

     This video although for some reason quite grainy shows the start of construction on my
HOn3 Monarch Branch. I may not have selected the correct format when downloading onto YouTube
     This is part one.


Thanks for dropping by.
Rod.


19/07/2020

Another update.

A new building completed.

    Whilst we are again in lock-down here in Melbourne (two weeks completed of 6) I have scratch built an additional building for Montrose.
    This is for Montrose Lumber. After scrounging around for some Evergreen Siding (A$ 14.95 a sheet) and only finding one left out of three hobby shops close by I just had to make do.
    To make the white styrene look like aged wood I brush painted it with AK interactive wood colours. This is a box of 5 colours that blend to give a good effect.
    Here is the outcome just sitting where it will settle when the weather get warmer in the garage.


   Friend John did the sign and suggested a few weeks back to try printing it onto Tissue paper in lieu of copy paper. This made the sign much thinner so it was able to sink into the clap Board Siding making it almost painted on. I am very happy with the way this building and sign turned out.
  On to the next Lock-down project.
Rod.

08/07/2020

Another update

More progress on the Monarch Branch

     Doing some research of grain elevators for my town of Montrose I have been able to locate several old images of the elevator owned and operated by Graden Flour Mills that resided in Durango back in the early 1900's. Good friend Peter sent me a link where I was able to download a drawing of the front elevation of this mill and so with this ammunition I set about to scratch build (as close as possible) this mine.
    Having the almost scale drawing made it a lot easier so the plan was to make each section bit by bit following drawings I made to try and keep the variations to the size of each  to as close to scale as I could.
    Fortunately I had purchased some Evergreen Clap Board Siding several weeks before Covid 19 lock-down and with bits of corrugated and V Grove siding I had in stock set about construction.

  Here are just a few of the mill under construction.


   The main building are complete ready for placement on the RR however there is quite a ways to go yet before this can take place.
   In the meantime I have started to scratch build another building and this will be for Montrose Lumber to be placed well in Montrose.
 Thanks for coming to take a look.
Rod.

Quite

21/06/2020

New Video of Thompson River Canyon

     Just up loaded a compilation of stills during the construction of Thompson River Canyon a display layout built by Vic and myself back in the late 90's into early 2000's. The layout was first shown at the National N Scale Convention held in Victoria in 2003. We did not have time to construct the light boxes for the convention however we managed to get them completed for several exhibitions held here in Melbourne and one in South Australia. It was on display at the AMRA exhibition held in the Box Hill swimming complex, the Sandown Model Railway Exhibition and the AMRA exhibition held at the Caulfield Racecourse.
    The layout was featured in N Scale Railroading Magazine and a Canadian Model RR mag.
    There is a small amount of added video taken after the layout was purchased by Barry.


   We had a great time building this layout and a lot of fun when we had the privilege of being able to show it to the public. Many memorable moment were created with friends along its journey.
  There were several videos taken by others whilst the layout was on display.
Have fun modeling.
Rod.

30/05/2020

Lockdown has been productive.

Quite a lot done since lock-down.

     Lock down has been really bad for a lot of folk however when you have been retired for almost 19 years, getting old with a damn good hobby it is not really a concern. I am sorry that we have not been able to get together with the Friday group for 10 weeks or more however it has not stopped me from cracking on with assembling kits and doing scenery for my Monarch Branch in preparation for their next visit.
    Once the main kit ( the Campbell Models Silver Spur Mine) was assembled I attacked a few Main Street Model buildings purchased from Peter S. Once these were done I then went into the train room over many days working on the scenery where the mine was be positioned along with the powder shed and other scratch built pieces.
 
   These are progress shots as of two days ago.


    The two buildings below will be placed in Poncha Junction as more work needs to be done in this town.


     That's for this post so see you soon.
Rod.

05/05/2020

So much to do

Keeping busy.

     Boy how time flies when you are having fun. So much time has flown by whilst being self isolating here in Melbourne.
     I have not been sitting here idly watching time go by however I have been working on the Campbell Kit of the Silver Spur Mine that I purchased from a fellow HOn3 modeller in the states. This kit was produced around the early 70's and you could smell the air when the box of sticks was opened. This is a cardboard kit with corrugated aluminum siding for the roof and walls that is glued to the cardboard once cut from the sheets.
    Having used aluminum like this in the past I am not a big fan as I find it difficult to cut, paint to stick to it and hard to have it sit nicely on the roof of previous buildings where I have used it.
    So I have used a paper product from a small shop in S.A. that is really easy to use and paint. And as a bonus it adheres nicely to any surface.

   This is a series of in progress shots I took during weeks of build


All siding attached and painted to walls and roof.


      There are several more buildings that have been completed and not shown.
 Now I need to get to and work the foam for scenery so this mine will fit the space I am planning for it.

So until the next post, thanks for stopping by.
Rod.


28/02/2020

Wow over a month since the last post.

Lots of scenery completed

     Its hard to believe that it is over a month since my last entry to this blog however I have been working very hard on the Monarch Branch scenery wise in all that time.
    Our Friday round robin group came yesterday and it was for this reason that I wanted to put in a lot of effort to get much more scenery done staring from the end of Gunnison yard to as far along the layout towards the rear wall as possible since we gathered here the last time in January.
    This meant painting my backdrop, roughing in the foam for my scenery, applying rock mold castings and laying on all the plaster gauze for the scenery base. A coat of plaster on top of the cloth and then I was ready to do all the colouring.
    I used the same paint base as used in Cimarron as I found this to be a good overall effect. The standard India Ink and Alcohol wash was applied to all the rocks, allowed to dry, then a wash of ground colour was applied to them. Further colours were applied to the rocks to bring out their details.
   I had completed the buildings for this area so ground cover was applied and after being allowed to dry overnight the buildings were added.
   The following images cover most of the process.


    I am very happy the way this area has turned out thus far. Still lots to be done however.
We had a good day yesterday operations wise so it was good to get this work completed and the area cleaned up ready for the day.
Thanks always for coming by.
Rod.